Documentation
Expenses
Record receipts, use AI scan, categorize, and bill expenses in Effitrio
On this page▼
Expenses
Track spending, attach receipts, and (where enabled) use AI receipt scanning. Open Finance from the sidebar, then the Expenses tab. On laptop and desktop, creating or editing an expense usually opens in a slide-over next to your list.
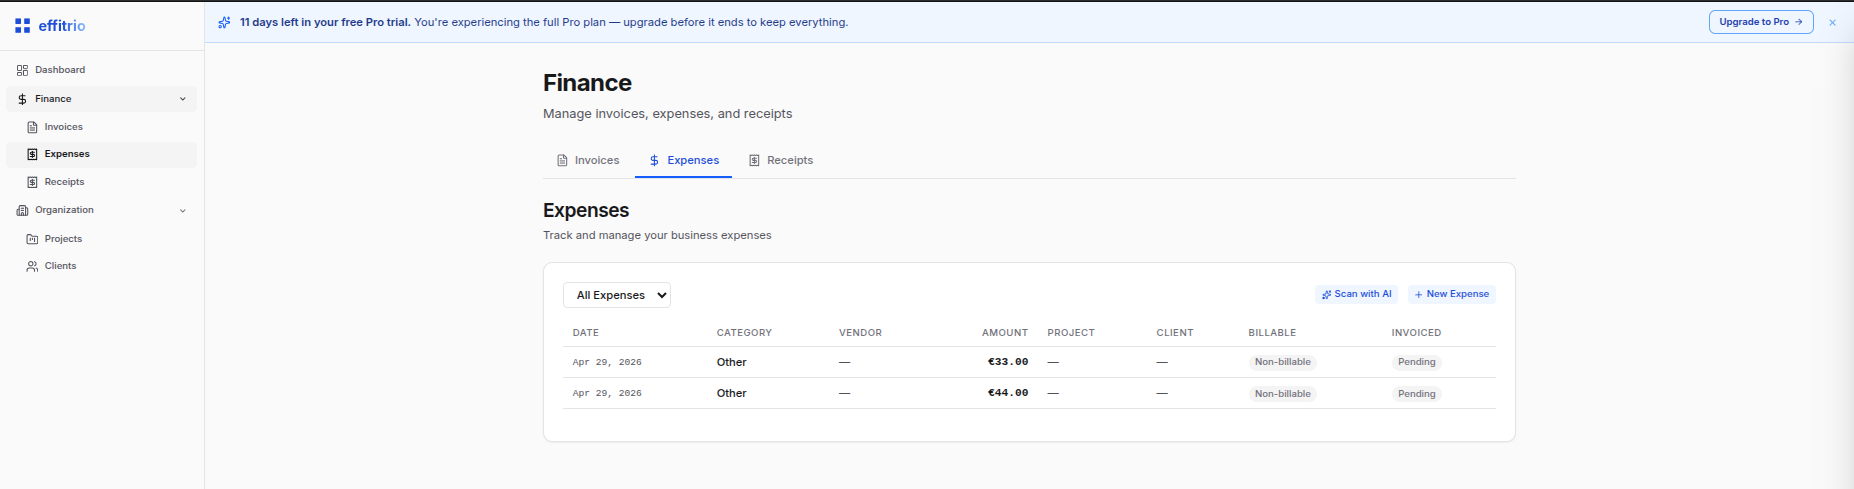
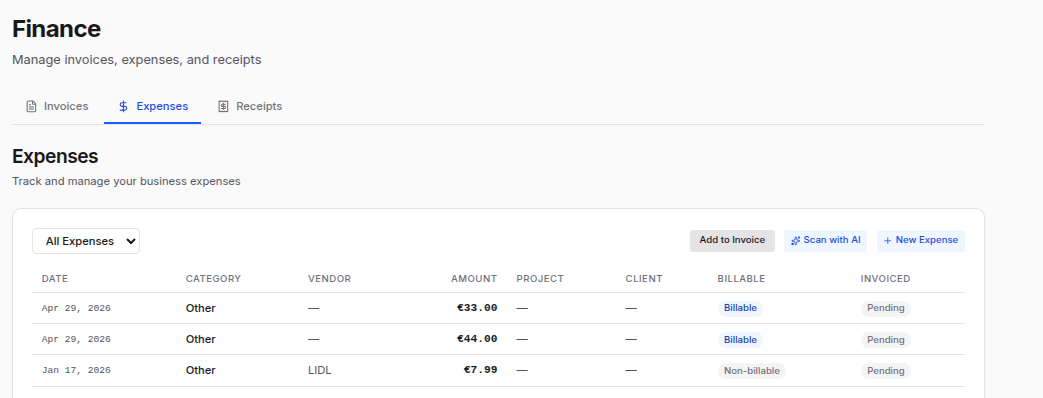
Expenses tab
Use the type filter (All, Billable, Invoiced, Uninvoiced), Scan with AI or New Expense at the top, and Add to Invoice when you have uninvoiced billable items.
Recording an expense
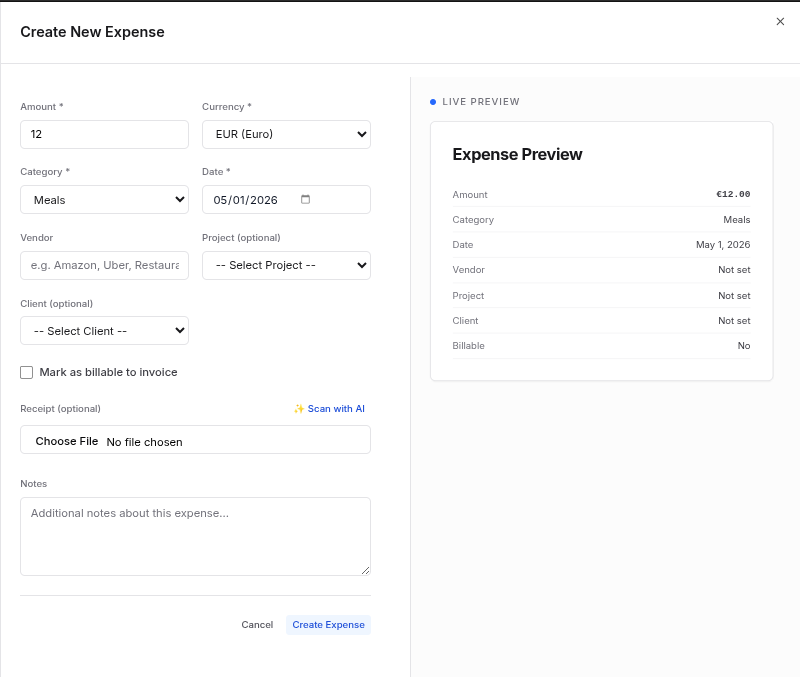
- Click New Expense.
- Enter amount, currency, category, date, and optional vendor / notes.
- Optionally attach a receipt (image) with Choose file under Receipt.
- Set billable if you plan to recharge the client.
- Save (or Create Expense) to add the row to your list.
Scan with AI
From the expenses toolbar, Scan with AI opens the create flow and starts the AI receipt assistant. Upload a receipt image; the service extracts fields (merchant, amount, date, category, etc.) so you can review and save.
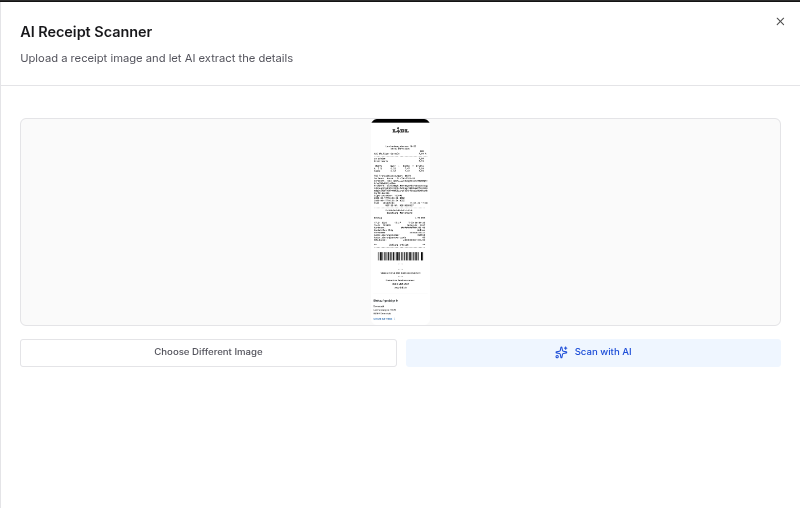
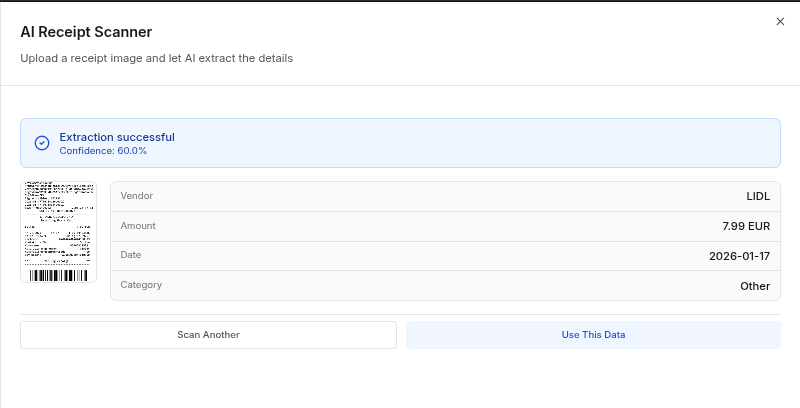
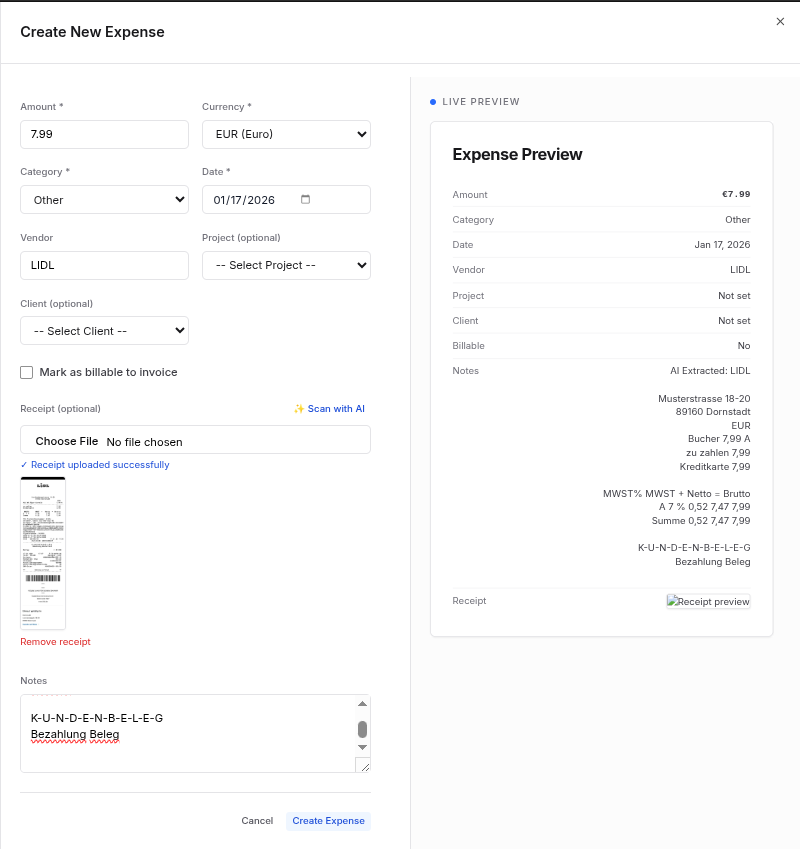
You can also open Scan with AI from inside the expense form (same modal).
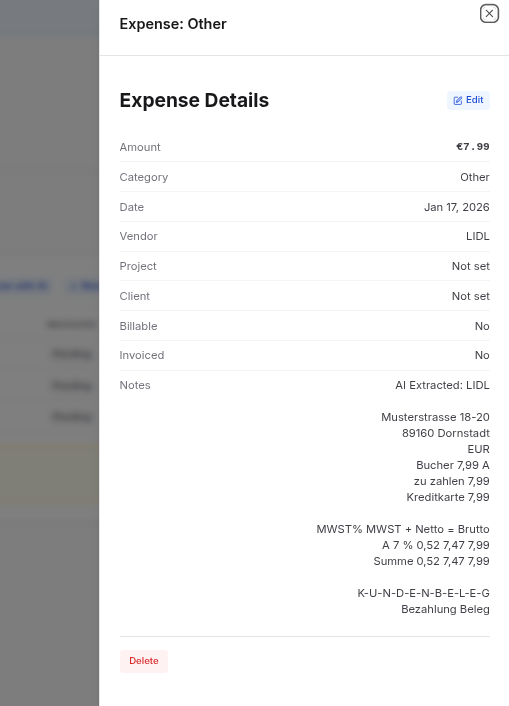
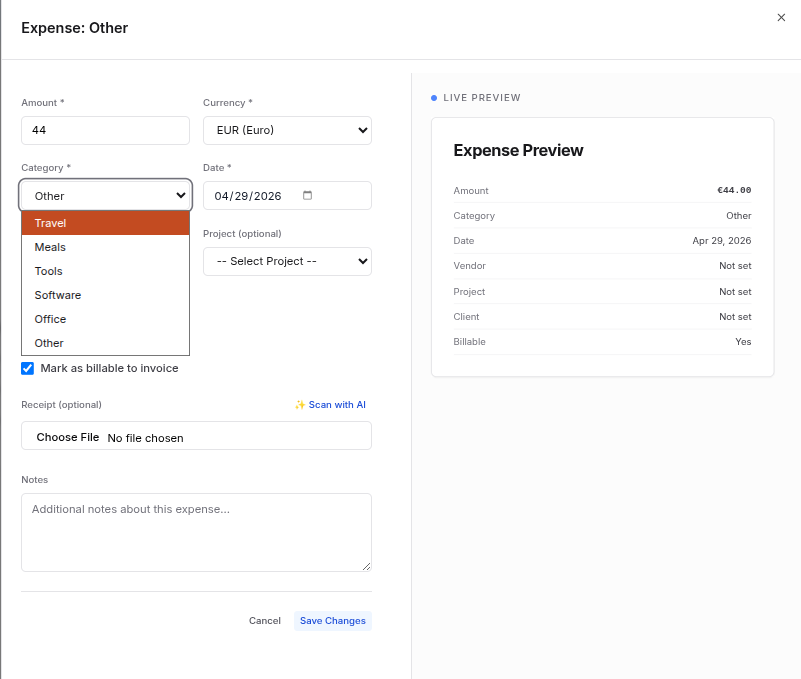
Editing an expense
- Click an expense in the list to open the preview.
- Choose Edit, change fields or receipt, then Save.
Billable expenses that are already invoiced may be locked from edits that would break billing history—follow your workspace rules.
Categories
Pick a category so reports stay meaningful. Built-in values align with the product:
- Travel — transport, lodging
- Meals — food and client meals
- Tools — equipment and gear
- Software — subscriptions and licenses
- Office — supplies and workspace costs
- Other — everything else
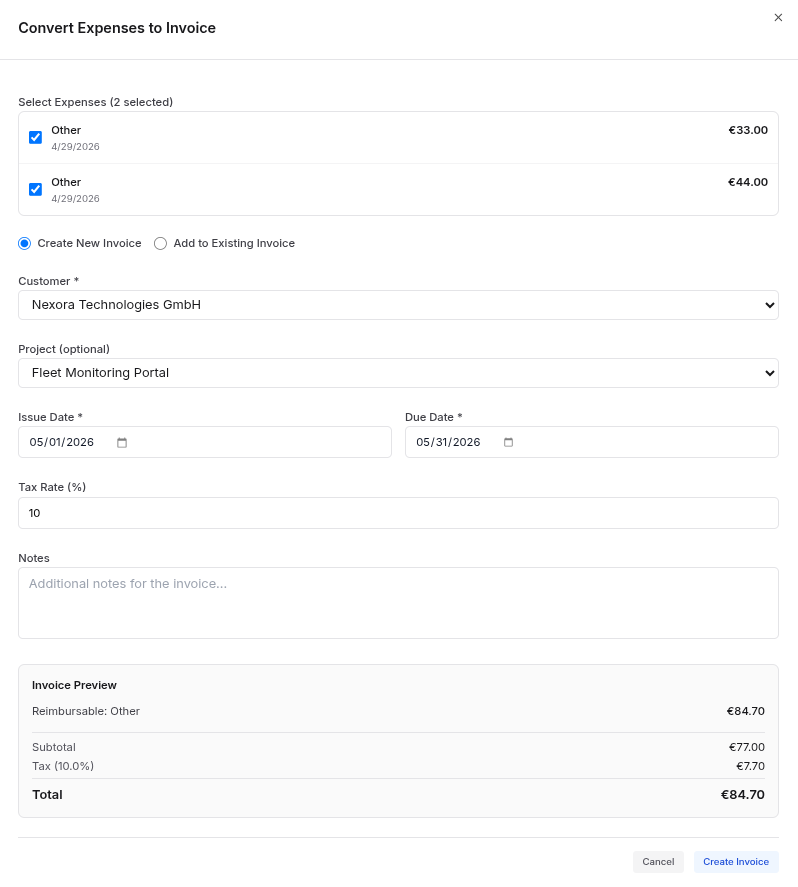
Add billable expenses to an invoice
- Ensure expenses are billable and not yet invoiced.
- Click Add to Invoice (from the tab toolbar or from an expense preview).
- Select the target invoice or create one, choose line items, and confirm.

Status and filters
Use the status filter and list columns to focus on what still needs invoicing or what is already billed.
Reports and totals
Stay on Finance → Expenses to scan totals by time range and category. Narrow the list with filters, then use finance and export features elsewhere in the app as your plan allows.
Deleting an expense
- Open the expense preview.
- Use Delete and confirm.
Note: Removing an expense also removes its stored receipt file when applicable. You cannot delete expenses that are already tied to an invoice in a way that would break compliance—use your organization’s policy for corrections.